Windows
How to Start Building Your DIY Window Frame in Less Than an Hour
TL;DR: Framing a window is an easy DIY upgrade that instantly enhances your home’s interior. Whether you’re replacing old trim or starting fresh, window casing adds polish and depth to any room. This guide walks you through measuring, cutting, and installing new trim with basic tools and a little patience. The best part? You don’t need to be a pro to get professional-looking results.
Your Complete DIY Window Frame Project Guide
Embarking on a DIY window frame project not only empowers you with the satisfaction of enhancing your living space by yourself but also can save you a substantial amount of money compared to purchasing ready-made window frames or hiring professionals. This guide promises to handhold you through the entire process – from planning and selecting materials to the finishing touches, making the project feasible for beginners and experienced DIYers alike.
Feeling pumped to start your DIY but looking for advice or the right supplies at the right price? Reach out to Builders Surplus by giving us a ring at 866-739-1636 now!
For those ready to embark on this DIY venture but might be looking for ready solutions or additional supplies, remember to check out the wide variety of windows available at Builders Surplus. With our vast selection, you might find the perfect window to complement your DIY frame or inspire another project!

Whether you’re aiming to let more light into your workshop, add a customized touch to your living space, or simply undertake a project that marries functionality with aesthetics, this article will guide you through creating a sturdy, stylish DIY window frame in less than an hour.
Planning Your DIY Window Frame
Planning is crucial when embarking on your DIY window frame project. This stage sets the foundation for a successful build. Let’s dive into how you can efficiently plan your project, select the right materials, and gather the essential tools and equipment needed.
Selecting Materials
First things first, choosing the right material for your window frame is vital. Each material has its unique benefits and considerations:
- Wood: Offers a classic look and excellent insulation properties. Oak is particularly praised for its durability and resistance to wear and tear.
- Vinyl: Known for its energy efficiency, low maintenance, and affordability. It doesn’t require painting or staining.
- Aluminum: Provides a modern appearance, strength, and durability. It’s also lightweight and resistant to corrosion.
- Fiberglass: Offers the best of both worlds—durability and energy efficiency. Plus, it’s resistant to warping, rotting, and expansion or contraction.
When selecting materials, consider the climate, the style of your home, and how much maintenance you’re willing to perform.
Tools and Equipment Needed
Having the right tools and equipment is essential for a smooth DIY experience. Here’s a list of what you’ll need:
- Miter saw: For making precise cuts, especially the miters where the frame pieces will join.
- Table saw: Useful for ripping boards to the correct width.
- Router with a straight router bit: For cutting a rabbet (a groove) along the edge of the frame where the glass will sit.
- Caulking gun: For applying caulk or adhesive during the assembly and installation process.
- Hammer or brad nailer with nails: For joining the frame pieces together. A brad nailer can make this process quicker and smoother.
- Clamps: To hold the frame together securely while the glue dries.
- Drill with drill bits: For pre-drilling holes for the nails or screws, ensuring a clean, split-free finish.
- Tape measure, gloves, and eye protection: Essential for accurate measuring and personal safety.
Measure Rough Opening
Before you start cutting and assembling, you must measure the rough opening where the window frame will be installed. This is the hole in your wall where the window will go. Measure the height and width at several points to ensure accuracy, as walls can be uneven. Subtract about 1/4 inch from each dimension to allow for expansion and easy installation.
Design Considerations
When designing your window frame, think about the overall look you’re aiming for and how it complements your space. Consider whether you want a simple, functional frame or something more decorative with intricate trim or millwork. Also, plan for the type of glass or plexiglass you’ll use, as this might affect the frame’s design, especially the width of the rabbet cut.
The key to a successful DIY project lies in thorough planning and preparation. Take your time to select the right materials and ensure you have all the necessary tools and equipment before you start. And don’t forget to check out the wide variety of windows available at Builders Surplus. Whether you decide to build your frame around a newly purchased window or use the glass you have on hand, Builders Surplus has options that can meet your needs and inspire your projects.
Building the Frame Step-by-Step
Building a DIY window frame can seem daunting, but with the right guidance, it’s a project well within the reach of most DIY enthusiasts. Let’s break it down into manageable steps, focusing on Measuring and Cutting, Assembling the Frame, and Installing the Glass. Safety first: always wear gloves and eye protection when working with tools and materials.
Measuring and Cutting
- Measure the Rough Opening: This is the space in the wall where your window will go. Measure the width and height carefully. Subtract 3/4 inch from each dimension to allow for fitting adjustments.
- Cut Frame Boards to Length: Based on your measurements, cut two vertical and two horizontal boards. Use a miter saw for clean, straight cuts.
- Cut to Width: Use a table saw to adjust the boards to the correct width, matching the depth of your rough opening.
Assembling the Frame
- Cut a Rabbet for Glass: A rabbet is a recess along the edge of the board where the glass will sit. Use a router with a straight bit to cut a 1/2-inch-deep by 3/4-inch-wide rabbet.
- Cut Miters: Set your miter saw to a 45-degree angle to cut the ends of each board. This allows them to fit together neatly at the corners.
- Sanding: Smooth each board with sanding blocks, starting with 120-grit and finishing with 220-grit to remove any rough spots.
- Mockup and Tape: Lay out the boards in the shape of your frame, rabbets facing down. Use painter’s tape to hold the corners together.
- Glue and Clamp: Apply wood glue to the joints, reassemble the frame, and clamp it together tightly. Wipe away any excess glue.
- Nail Joints (Optional): For extra stability, you can nail the joints together with a hammer or brad nailer.
Installing the Glass
- Buy Glass: Choose a glass or plexiglass sheet that fits the dimensions of your frame. Builders Surplus offers a variety of options suitable for window projects.
- Install Glass: Place the glass into the rabbet you cut earlier. Use window glazing putty and a putty knife to secure it in place.
- Install Remaining Glazing: Apply window and door caulk around the edges of the glass to seal any gaps and ensure your window is weatherproof.
- Paint Window Frame: Apply a coat of raw wood primer, followed by exterior paint in the color of your choice. Let it dry thoroughly.
Safety Tips: Always cut away from your body when using knives or saws. Keep your work area clean and uncluttered to avoid accidents.
The key to a successful DIY window frame is patience and precision. Don’t rush the process, and double-check your measurements before cutting or assembling anything.
In the next section, we’ll discuss adding those all-important finishing touches that will make your window frame not just functional but a true part of your home’s charm.
Adding Finishing Touches
Decorative Trim and Millwork
After you have built and installed your DIY window frame, it’s time to add those finishing touches that will elevate the look of your windows and, by extension, your entire room. This part of the process is where your window frame project truly comes to life, adding character and style to your home.
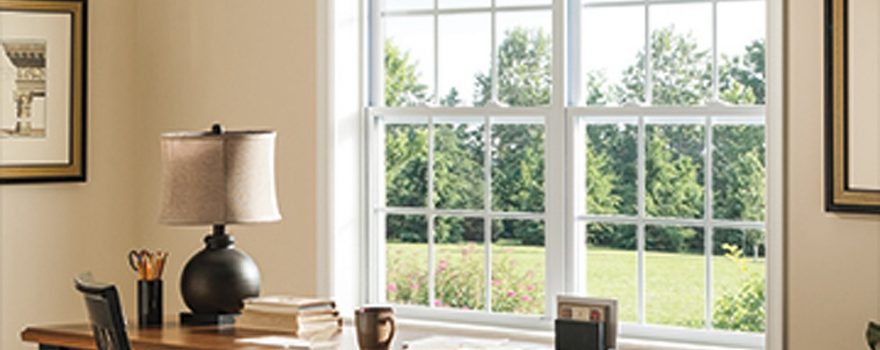
Install faux muntins: If you love the classic look of divided light windows but have a single-pane window, faux muntins are an easy and effective solution. Simply cut 3/4-inch by 1/4-inch flat molding to the height and width of your window. Attach them vertically and horizontally across the glass using double-sided mounting tape to create that traditional paneled appearance. It’s a simple yet transformative touch that adds elegance to any window.
Crown moulding: This type of moulding is typically used where the wall meets the ceiling, adding a graceful and elegant transition. In window design, crown moulding can also be used to enhance the top of the window frame, giving it a more finished and sophisticated look.
Casing: This is the trim that goes around the perimeter of your window frame, providing a neat and tidy look by covering the gap between the wall and the frame. Consistency in casing style throughout your home can help in achieving a cohesive look. You can choose from simple to more decorative profiles depending on your home’s style.
Base moulding: Though not directly related to windows, base moulding runs along the base of your walls and can complement the look of your windows when matched with the casing. It helps in achieving a uniform style throughout your interior.
Adding these decorative trim and millwork elements not only enhances the aesthetic appeal of your windows but also increases the overall value of your home. It’s an opportunity to showcase your personal style and attention to detail.
Why Choose Builders Surplus
At Builders Surplus, we understand the pride and satisfaction that comes from a DIY project done right. That’s why we’re here to support you every step of the way—from selecting the perfect materials to finding the finishing touches that make your project truly yours.
Wide Variety of First Quality Products: Our shelves are stocked with everything you need to complete your DIY window frame project.
At Builders Surplus, we’re here to support your DIY adventure every step of the way. We understand that the right combination of quality materials, the proper tools, and a bit of expert advice can empower you to craft something truly special for your home.
Come see us now and let’s make those DIY aspirations come true. Need help or have questions? Give us a call at 866-739-1636 and let our knowledgeable team assist you.
When value’s a must, shop Builders Surplus.
FAQs: DIY Window Framing
Q: What’s the purpose of window casing or trim?
A: Window casing covers the gaps between the window frame and wall, providing a clean, finished look while also helping to insulate and protect.
Q: What tools do I need to frame a window?
A: You’ll need a tape measure, miter saw, level, finish nails (or nail gun), wood filler, and caulk. A little painter’s tape and paint or stain help finish the job.
Q: Can I frame a window if I have no prior experience?
A: Absolutely! With some basic DIY skills, you can install window trim in an afternoon. Our blog post breaks it down step by step.
Q: What style of trim should I use?
A: It depends on your home’s style. Choose from classic colonial, modern flat stock, or craftsman-style trim. Builders Surplus carries a wide selection.
Q: Do I need to remove old trim first?
A: Yes, it’s best to start with a clean surface by removing old casing carefully before installing the new trim.
Q: Can I paint or stain the trim before installation?
A: Yes—and it can save time. Pre-finishing your trim makes touch-ups easier once it’s installed.