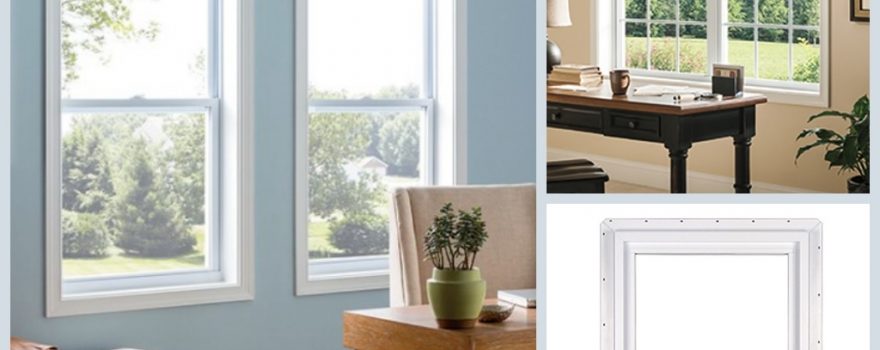
Windows
How to Install DIY Window Trim Molding: Step-by-Step Guide
Transform Your Home With DIY Window Trim Molding
If you want to add some charm and character to your home, then DIY window trim molding is the way to go. It’s budget-friendly, enhances your space, and is simpler than you might think. Here’s a quick breakdown of what you’ll need and the steps involved:
- Materials: Basic pieces of wood like 1x4s and 1x6s, nails, wood glue, caulk, and paint.
- Tools: A saw (hand or power), a hammer or nail gun, a tape measure, and a level.
- Steps: Measure and cut the wood, install the window sill and trim pieces, secure them with nails, and finish with caulk and paint.
As you can see, you don’t need to be a pro to get professional-looking results. Builders Surplus offers everything you need to tackle this project, from affordable materials to expert advice.
Ready to get started on transforming your windows?
At Builders Surplus, we have everything you need to complete your DIY window trim project. Visit one of our five locations or give us a call at 866-739-1636 for expert advice and support.
Preparing for Your DIY Window Trim Molding Project
Before diving into your DIY window trim molding project, you need to gather all the essential materials and tools, understand the measurements, and take necessary safety precautions. This section will guide you through everything you need to know to get started.
Essential Materials and Tools
To begin, here’s a list of materials and tools you’ll need:
Materials:
- 1×4 boards: For the inside and outside trim.
- 1×6 boards: For the window sill.
- Crown molding: Adds a decorative touch to the top of the trim.
- Half round molding: Complements the crown molding for a finished look.
- Nails: 16 gauge 2″ nails for larger trim and 18 gauge 1 ¼” nails for delicate pieces.
- Wood glue: Provides extra stability.
- Caulk: Ensure it’s paintable, not silicone.
- Wood putty: For filling nail holes and gaps.
Tools:
- Miter saw: For precise cuts.
- Nail gun: Speeds up the nailing process.
- Tape measure: For accurate measurements.
- Speed square: Ensures your cuts are straight.
- Jigsaw: Useful for cutting out corners.
- Table saw: For trimming boards to the correct width.
Measuring and Cutting
Accurate measurements are crucial for a seamless fit. Here’s how to do it right:
- Measure the Window Sill:
- Measure the width of the window plus 10 inches to allow for a 5-inch overhang on each side.
- Cut your 1×6 board to this length.
- Cutting the Window Sill:
- Mark where to cut out the corners to fit into the window base.
- Use a jigsaw to cut along these lines.
- Fit and secure the sill using a nail gun.
- Measure and Cut the Inside Trim:
- Measure the distance between the front of the window and the front of the drywall.
- Cut 1×4 boards to fit the top and sides of the window frame.
- Nail these in place, ensuring they are flush with the drywall.
- Trim Reveal:
- Leave a ⅛” reveal when installing the outside trim. This helps hide minor imperfections and makes caulking easier.
- Measure from the window sill up to the inside of the top board, adding ⅛” for the reveal.
- Cut 1×4 boards to this length for each side and nail in place.
- Cut and Install Crown Molding:
- Measure and cut crown molding to run along the top of the frame.
- Secure with an 18 gauge nail gun.
- Use wood glue and painter’s tape to hold end caps in place until the glue dries.
- Add Half Round Molding:
- Miter the ends to 45 degrees and nail along the bottom edge of the top 1×4.
- Splice pieces together if necessary, securing with wood glue and tape.
By gathering the right materials and tools and taking accurate measurements, you’ll set a solid foundation for your DIY window trim molding project. Next, we’ll discuss the step-by-step process of installing your new trim.
Step-by-Step Guide to Installing DIY Window Trim Molding
Removing Old Trim and Preparing the Window
First, if your window has existing trim, you’ll need to remove it. This step is crucial to ensure a clean and professional finish.
- Score the Caulk: Use a utility knife to cut through the caulk along the edges of the old trim. This helps to prevent damaging the wall when you pry off the trim.
- Pry Off the Trim: Use a prybar and hammer to carefully remove the old trim. Start at one corner and work your way around the window.
- Remove Residue: Clean any remaining caulk or adhesive from the window frame. This ensures a smooth surface for the new trim.
- Inspect and Clean: Check for any gaps between the window and the rough framing. Seal these with straw foam if needed. Clean the window frame thoroughly to remove dirt and residue.
Installing the Window Sill
The window sill is the base of your new trim and needs to be installed first.
- Measure and Cut: Measure the width of the window opening and add extra length for overhang (typically about 5 inches on each side). Cut a 1×6 board to this length.
- Fit the Sill: Hold the board against the bottom of the window and mark where to cut out the corners to fit into the window base. Use a jigsaw for this task.
- Secure the Sill: Once everything fits well, use a nail gun with 2-inch brad nails to attach the sill to the window base. Ensure it is level and shim if necessary.
Adding the Inside and Outside Trim
Next, you’ll add the trim around the window. This includes both the inside and outside trim pieces.
- Cut and Install Inside Trim: Measure and cut 1×4 boards for the sides and top of the window. Hold the boards up to the window, mark the length, and cut. Secure these with brad nails, ensuring they are attached to the studs behind the drywall.
- Cut and Install Outside Trim: Measure and cut 1×2 boards to fit around the 1x4s on the sides and top. Turn the 1×2 pieces on their sides and secure them with brad nails into the 1x4s, not the wall.
- Add Crown and Half Round Molding: Cut and fit crown molding to run along the top board. Use a smaller 18-gauge nailer for this delicate work. For the half round molding, miter the ends at 45 degrees and nail it along the bottom edge of the top 1×4.
Finishing Touches
The final steps are all about making your new window trim look polished and professional.
- Fill Gaps and Holes: Use wood putty to fill nail holes and any gaps in the trim. Sand smooth with fine-grit sandpaper once dry.
- Caulk Seams: Caulk all gaps between the trim and the wall and where the trim meets the window. This prevents moisture issues and air leaks.
- Prime and Paint: Prime all raw wood to ensure a smooth paint finish. Apply two coats of high-quality paint, allowing each coat to dry thoroughly.
By following these steps, your DIY window trim molding will not only look beautiful but will also add significant character to your home. Next, we’ll cover some tips and tricks to ensure a professional finish and long-lasting durability.
Tips and Tricks for a Professional Finish
Common Mistakes to Avoid
- Incorrect Measurements: Measure twice, cut once. Always double-check your dimensions before cutting.
- Improper Nailing: Use nails long enough to penetrate the trim and drywall and into the studs or framing behind. For delicate pieces like crown molding, use an 18-gauge nailer for a cleaner finish.
- Skipping Caulking: Skipping caulking can lead to moisture issues and air leaks. Always caulk between the trim and the wall and where the trim meets the window.
Get Materials and Support at Builders Surplus
At Builders Surplus, we’re committed to helping you bring your home improvement dreams to life. Whether you’re tackling a DIY window trim molding project or any other renovation, we offer the materials, tools, and expert advice you need for success.
When you choose Builders Surplus, you’re choosing value for money. Our goal is to make home improvement accessible and affordable for everyone.
Your home improvement success is our priority. With the right materials, tools, and advice from Builders Surplus, you can transform your windows into stunning features that add charm and value to your home. Explore our range of replacement windows and make your DIY aspirations a reality today.
We’re here to help you every step of the way. For any questions, give us a call at 866-739-1636. Happy building!