
Interior
Laundry Room Makeover Ideas That Turn a Chore Space Into a Useful One
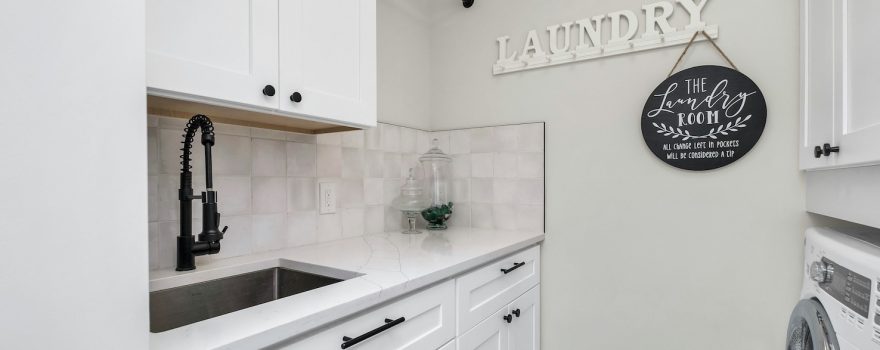
TL;DR: The best laundry room makeover ideas focus on three things: real storage, a durable surface to fold and stage on, and flooring that handles water without complaint. Add cabinetry above and around the machines, a counter that bridges them for folding, waterproof flooring underfoot, and a few smart finishing touches — and even the smallest laundry closet starts pulling its weight. Most makeovers come together in a long weekend with materials you can pick out yourself.
Planning a laundry refresh? Reach out to Builders Surplus or call 866-739-1636 — our team will help you spec cabinets, counters, and flooring that fit your space.
Why Laundry Room Makeover Ideas Are Worth the Effort
Most laundry rooms in older New England homes started life as utility closets — a hookup, a vinyl floor, and not much else. The best laundry room makeover ideas treat that under-built space as the workhorse it actually is, with thoughtful cabinetry, a real folding surface, durable flooring, and a few finishing details that make the room genuinely pleasant to use. The good news: laundry rooms are some of the most rewarding DIY refreshes you can take on, because the footprint is small enough that quality materials don’t break the budget, and the impact on daily life is real.
Need help planning? Stop by Builders Surplus or call 866-739-1636. Here at Builders Surplus, our team helps homeowners across Rhode Island, Connecticut, and Massachusetts pick cabinets, flooring, and finishes for laundry and utility spaces.
Start with Real Storage
The first move in almost every successful laundry makeover is adding cabinetry where there was none. Wire shelves don’t cut it — laundry rooms accumulate detergent, dryer sheets, stain remover, cleaning supplies, and lint brushes that all need a real home. Look at kitchen cabinet lines for laundry storage; they’re identical in construction and finish, and you don’t pay a premium for a “laundry” label.
- Upper cabinets directly above the washer and dryer — full-depth, with adjustable shelves.
- A tall pantry-style cabinet to the side for ironing boards, vacuums, and bulky items.
- Drawer banks beneath any unused counter space for socks, lint rollers, and small items.
- An open shelf or two for the items you use every cycle — detergent and stain spray.
- A pull-out hamper drawer for sorting whites and colors before they hit the machine.
Add a Counter for Folding (and Hiding the Machines)
A continuous counter across the top of front-load machines is one of the highest-impact moves in any laundry makeover. It gives you a real folding surface, hides the machines visually, and lets you stage piles of clean clothes without commandeering the dining table. Quartz, butcher block, or even a sturdy laminate all work — laundry counters take less abuse than kitchen counters, so the material choice has more latitude than you’d think.
If your machines are top-load, build out a fold-down or wall-mounted shelf nearby instead. Either way, you need a flat, sturdy surface to fold on — without it, every load ends up draped over a chair.
Pick Flooring That Can Handle Water
Laundry rooms see more spilled detergent, dripping clothes, and slow drain-line leaks than most homeowners want to admit. Flooring needs to be genuinely waterproof — not just water-resistant. Two strong options:
Luxury Vinyl Plank
LVP is the most popular choice for laundry rooms right now. It’s fully waterproof, looks impressively close to real hardwood or stone, and most lines are DIY-friendly with click-lock installation. The pros and cons of vinyl plank flooring line up well for this kind of space.
Porcelain or Ceramic Tile
Tile is the most durable choice and absolutely waterproof when sealed properly. The trade-off is cost, installation time, and a colder underfoot feel — though radiant heat under tile in a laundry room is a small luxury that pays off in New England winters. For inspiration on durable bathroom-style flooring that translates well to laundry, the best waterproof flooring for bathrooms covers similar ground.
Plumbing, Electrical, and Ventilation Details
A few non-glamorous upgrades make a huge functional difference and are easier to handle during a makeover than after:
- Install a real drain pan under the washer — every front-load machine eventually drips.
- Add a recessed laundry box for the supply lines so the washer can sit closer to the wall.
- Replace old rubber washer hoses with stainless braided supply lines — burst hoses are one of the most common home insurance claims.
- Add a dedicated GFCI outlet for the iron or steamer, separate from the appliance outlets.
- Make sure the dryer vent is metal (not flexible plastic) and as short and straight as possible.
- Consider an exhaust fan if the room doesn’t have a window — laundry humidity is real.
Finishing Touches That Lift the Whole Room
A few small details separate a basic refresh from a real makeover:
- Updated trim — upgraded base moulding and door casing tie the room into the rest of the home.
- A hanging rod above the counter for drip-dry and air-dry items.
- A pegboard or hook rail for ironing boards, brooms, and dustpans.
- Good lighting — ceiling fixture plus under-cabinet lighting over the folding counter.
- A coat of paint in a clean color (off-white, soft sage, navy) to brighten the space immediately.
- A laundry sink, even a small one, for hand-washing and pre-soaking.
Don’t Overlook the Door
Most laundry rooms are hidden behind a hollow-core interior door that the original builder chose because it was the cheapest option. Swapping it for a solid-core or paneled interior door significantly dampens the noise from the machines. A pocket door or barn-style slider is worth considering if the room is tight — both eliminate the swing arc and free up wall space for cabinetry.
Plan the Makeover Around Real Daily Use
The best laundry room makeover ideas come together when you design around what actually happens in the room — sorting, washing, drying, folding, and putting away. Cabinetry handles the storage problem. A folding counter handles the staging problem. Waterproof flooring handles the spills. A few smart finishing moves turn it from a forgotten utility space into a room that quietly runs the household. With the right materials picked out, most laundry makeovers come together in a long weekend.
Here at Builders Surplus, our expert team is ready to help you spec cabinets, flooring, moulding, and finishing details. Stop by one of our locations in Rhode Island, Connecticut, or Massachusetts, reach out online, or call 866-739-1636 to talk through your laundry project.
Frequently Asked Questions
How much does a laundry room makeover typically cost?
A DIY refresh — cabinets, counter, flooring, paint, and finish hardware — usually runs $2,500 to $6,000 in materials, depending on the size of the room and the quality of finishes. Hiring out installation or making structural changes adds to the total.
What’s the best flooring for a laundry room?
Luxury vinyl plank is the most popular choice — fully waterproof, DIY-friendly, and durable. Porcelain tile is the most durable option and absolutely waterproof, but it costs more and takes longer to install.
Can I use kitchen cabinets in a laundry room?
Yes — kitchen cabinet lines are typically the same construction, sizes, and finishes as cabinets sold specifically for laundry rooms. There’s no need to pay a “laundry” premium; pick the kitchen cabinets you like and use them.
Do I need a counter above front-load machines?
A continuous counter is one of the highest-impact upgrades in a laundry makeover — it gives you a real folding surface, hides the machines visually, and keeps small items from falling into the gap between them. Quartz, butcher block, or laminate all work.
Where can I find quality cabinets, flooring, and finish materials for my laundry room?
Here at Builders Surplus, we carry cabinets, flooring, moulding, and finish hardware at prices that beat the big-box chains. Contact us online or call 866-739-1636 to talk through your project.
Photo by Zac Gudakov on Unsplash