DIY
Your How to Guide for DIY Laying Tile
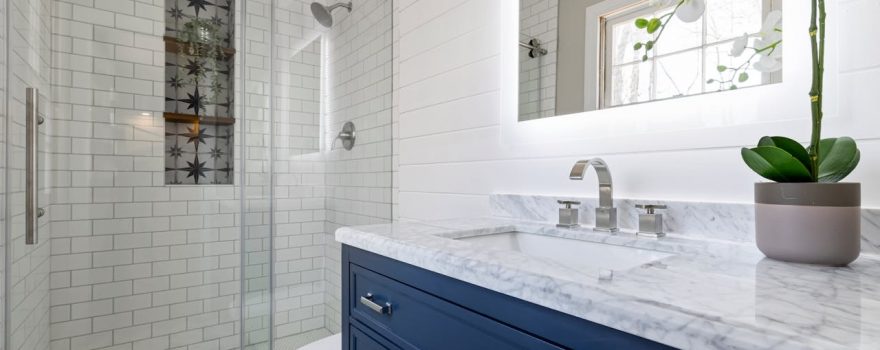
DIY Laying Tile: Tips and Tools for a Professional-Looking Finish
- Preparation is key: Ensure your subfloor or wall is clean, dry, and level.
- Choose the right tools: A tile cutter, spacers, and a suitable trowel are essential.
- Follow a layout: Plan your tile design to avoid unexpected surprises.
At Builders Surplus, we offer a broad selection of quality tiles and materials to help you start your DIY journey. With locations in Rhode Island, Connecticut, and Massachusetts, finding affordable products is easy. If you’re ready to lift your space with a DIY tile installation, contact us at 866-739-1636 for more information and assistance, or just stop by.
Preparing Your Space
Tools and Materials
Before diving into DIY laying tile, the first crucial step is to prepare your space properly. Ensuring your surface is ready will set the foundation for a successful tile installation. Here’s how to get started:
- Subfloor Preparation: Start by making sure your subfloor is clean, dry, and level. Any debris or moisture can affect the adhesion of your tiles. Use a straight edge to check for any uneven areas. If needed, sand down ridges or fill in low spots.
- Leveling and Cleaning: Sweep and vacuum thoroughly. A clean surface ensures better adhesion of the tiles.
- Backerboard Installation: For added stability and water resistance, especially in wet areas like bathrooms, install a cement backerboard. Secure it with screws and a drill. This layer acts as a sturdy base for your tiles.
To make the process smoother, gather these essential tools and materials:
- Mixing Paddle: To mix mortar and grout efficiently.
- Tile Markers: To mark cut lines on tiles.
- Screws and Drill: Needed for securing backer board.
- Backerboard: Provides a solid, water-resistant base.
- Mortar and Grout: Choose the right type based on your tiles.
- Trowels: Use notched trowels to spread mortar evenly.
- Tile Saw: For precise cuts, especially around corners and fixtures.
- Measuring Tape and Level: Ensure accurate measurements and a level installation.
- Knee Pads: Protect your knees during long hours of work.
- Spacers: Maintain consistent gaps between tiles.
- Bucket and Sponges: For mixing and cleaning.
- Utility Knife and Straight Edge: For cutting and checking surfaces.
With your tools and materials ready, you’re set to begin the exciting journey of transforming your space with tiles.
DIY Laying Tile: Essential Techniques
When it comes to DIY laying tile, understanding various patterns and techniques is key to achieving a professional look. Let’s explore five methods that can transform your space with style and precision.
Method 1: Traditional Grid Pattern
The traditional grid pattern is the most straightforward and beginner-friendly method. It involves laying tiles in a square layout with uniform spacing. Using tile spacers ensures even gaps between tiles, creating a clean and organized appearance. This method is ideal for those who prefer a simple, classic look.
Method 2: Brick-Lay Pattern
For a more dynamic look, consider the brick-lay pattern. This method offsets each row of tiles, similar to brickwork, creating staggered joints. It adds visual interest and can help hide minor imperfections in the subfloor.
Method 3: Diagonal Pattern
The diagonal pattern involves laying tiles at a 45-degree angle to the walls. This method can make a room appear larger and adds visual dynamics. It’s slightly more complex but offers a unique and sophisticated finish.
Method 4: Herringbone Pattern
The herringbone pattern is a complex design where tiles are laid in an interlocking fashion. This pattern offers high aesthetic appeal and is perfect for those looking to make a bold statement.
Method 5: Mosaic Pattern
For those who love artistic expression, the mosaic pattern uses small tiles to create intricate designs. This method allows for creativity and personalization, making it ideal for feature areas like backsplashes.
When laying tile, use the right materials. Thinset mortar is crucial for adhering tiles to the subfloor, and a tile membrane can prevent future issues by allowing slight movement.
Where to Source Your Tile
Starting on a DIY tiling project offers numerous benefits, both financially and creatively. By taking on the task yourself, you can save a significant amount of money compared to hiring professionals. In fact, DIY enthusiasts often find that they save hundreds of dollars in labor costs alone. Plus, there’s the added satisfaction of knowing you transformed your space with your own hands.
Whether you’re opting for a classic grid pattern or a bold herringbone design, you have the freedom to choose a style that reflects your taste and improves your home’s aesthetic.
At Builders Surplus, we understand the importance of offering quality materials at great value. Our extensive selection of tiles and expert guidance ensure that your DIY project is both successful and enjoyable.
For more information on our products and services, or if you have any questions about your tile project, don’t hesitate to contact us online or call 866-739-1636.
Visit our product pages to learn more about white vena ceramic tile, natural stone tiles, or porcelain tile for inspiration.
Photo by Curtis Adams